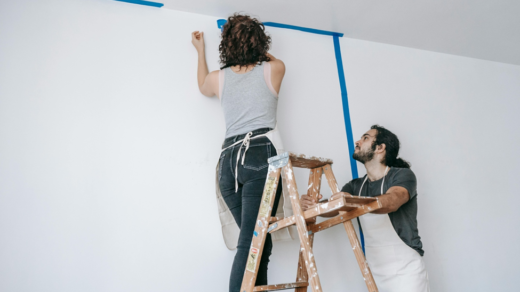
Elevated gardening is the perfect solution to grow your favorite fruits, vegetables, and herbs in your backyard. Here, we will go over everything you need to know to build and plant your elevated garden, from selecting the right materials to choosing the best plants for your space. Read on to get started on your very own elevated garden!
Materials needed
Building and planting your elevated garden is an excellent way to enhance your outdoor space and enjoy the benefits of gardening without the inconvenience of bending or kneeling. Before you get started, you need to gather some materials. Here are the essential materials that you’ll need:
- Elevated Garden Bed Kit: You can purchase an elevated garden bed kit or create one yourself. Elevated garden bed kits are available online or in your local home improvement store.
- Soil: Quality soil is essential for healthy plant growth. Choose soil specifically formulated for raised beds, which is loose, fertile, and drains well.
- Plants or Seeds: Determine which plants you want to grow in your garden, and choose plants that thrive in your growing zone and are suitable for the available sunlight.
- Fertilizer: Good organic fertilizer can enhance soil fertility, provide essential nutrients, and improve plant growth.
- Mulch: Mulch helps to prevent soil erosion, regulate soil temperature, retain moisture, and repress weed growth.
- Watering Can or Garden Hose: Plants need regular watering, especially during the summer, so ensure you have an adequate water source.
- Gardening Gloves: Gardening gloves can protect your hands from cuts, blisters, and other injuries, especially when working with thorny plants.
- Pruning Shears: Pruning shears can help to maintain the shape and size of your plants, eliminate dead or ill branches, and promote healthy growth.
Tools needed
Now that you have your materials, it’s time to gather the tools needed for building your elevated garden. The good news is that you won’t need anything too fancy or specialized. Here’s a list of the tools you’ll need:
- Measuring tape
- Saw (a circular saw or handsaw will work)
- Drill (a cordless drill will make the job easier)
- Screwdriver bits (make sure you have the right size for your screws)
- Clamps (to hold pieces in place while you’re drilling and screwing)
It’s also a good idea to have safety goggles and work gloves on hand, just in case. Once you have everything gathered, you’re ready to start building your garden!
Building the garden
Once you have all your materials and tools, it’s time to start building your elevated garden. Follow these steps to ensure a successful build:
- Measure and cut the wood. First, measure and cut the wood to your desired size. This will depend on how big you want your garden to be and your available space size.
- Next, assemble the sides of the garden. Assemble the sides. Make sure the corners are square and level. You can use screws, nails, or brackets to connect the pieces of wood.
- Add the bottom and legs. Once you have the sides assembled, add the bottom piece of wood to create the base of the garden. Then, attach the legs to elevate the garden to your desired height.
- Sand and paint (optional). If you want your garden polished, sand the wood to remove rough edges. You can also paint or stain the wood to add color to your garden.
- Line with mesh or fabric (optional). To prevent soil from leaking out of the garden, line the bottom and sides with mesh or fabric. This is optional but recommended to ensure your garden stays neat.
Building an elevated garden can take a few hours or an entire weekend, depending on your skill level and the size of your garden. Take your time and follow directions carefully to ensure a sturdy and long-lasting structure.
Planting the garden
Now that your elevated garden is built and ready to go, it’s time to start planting! Here are some suggestions to help you get started:
- Choose your plants wisely: Choose plants that will thrive in your area’s climate and suit an elevated garden. Some good options include lettuce, herbs, cherry tomatoes, peppers, and cucumbers.
- Plan your layout: Before planting, it’s a good idea to plan where each plant will go. Make sure you give each plant enough space to grow, and group plants with similar water and sunlight needs together.
- Add soil and compost: Fill your elevated garden with a good quality soil mix and add compost to give your plants the nutrients they need to grow. Make sure you leave enough space at the top of the garden for watering.
- Plant your seeds or seedlings: Follow the instructions on your seed packets or plant labels to ensure you’re planting each type of plant correctly. If you’re planting seeds, cover them with a light layer of soil.
- Water and fertilize regularly: Once your plants are in the ground, water them regularly. Elevated gardens dry out more quickly than traditional ones, so keeping them well-hydrated is important. You can also add a liquid fertilizer to your watering can to boost your plants.
- Harvest and enjoy: Depending on your chosen plants, you should start seeing some growth within a few weeks. As your plants mature, harvest them regularly and enjoy the fruits (or veggies) of your labor!
Maintenance
After all the hard work of building and planting your elevated garden, it’s important to keep it well-maintained to ensure the health and growth of your plants:
- Watering: Regular watering is vital to keeping your garden healthy. Make sure to water your plants frequently, especially during hot weather. The best time to water is early morning or late evening when the sun isn’t too intense.
- Fertilizing: Add fertilizer to your garden soil at the beginning of the growing season to boost your plants. Continue to add fertilizer throughout the season as needed, following the instructions on the package.
- Weeding: Keep an eye out for any unwanted plants (weeds) that may try to invade your garden. Pull them out as soon as you see them to prevent them from spreading and stealing nutrients from your plants.
- Pest Control: Pests like aphids, slugs, and snails may enter your garden. To keep them under control, you can use natural methods such as introducing beneficial insects or making homemade insect repellents. If the pest infestation is too severe, you may need commercial pest control products.
- Harvesting: As your plants mature, they must be harvested regularly. This will not only provide you with fresh produce, but it will also encourage more growth and productivity from your plants.
Congratulations, you have successfully built and planted your elevated garden! Anyone can create their garden oasis with the right materials, tools, and guidance. Not only is gardening a fulfilling and relaxing hobby, but it also provides fresh and organic produce for your home. Following this guide, you have stepped towards a sustainable and self-sufficient lifestyle. Remember to keep up with regular maintenance and have a garden shed nearby for convenience to enjoy the fruits of your labor. Happy gardening!